
Description
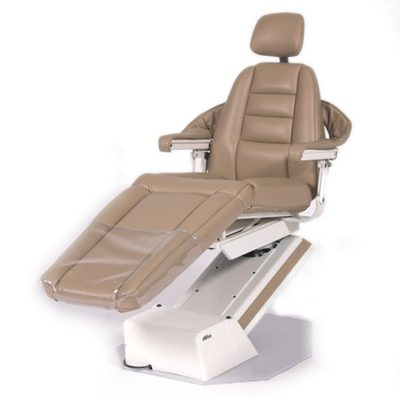
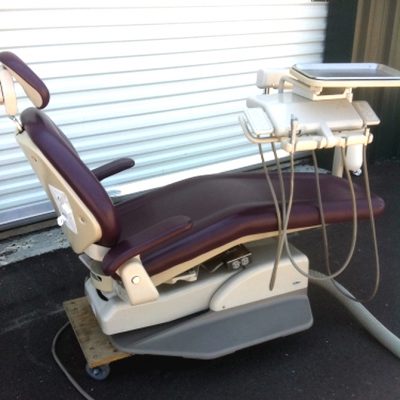
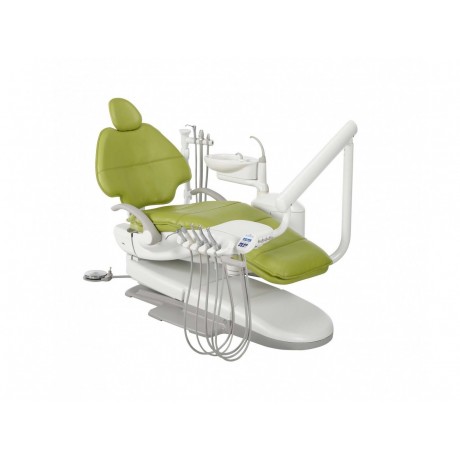
Used A-dec 511 Dental Chair Refurbished
|
Item |
Description |
|
A |
Double-Articulating Headrest |
|
B |
Back Upholstery |
|
C |
Multi-Position Armrests |
|
D |
Seat Upholstery/Toeboard |
|
E |
Footswitch |
|
F |
Chair Stop Plate |
|
G |
Power On/Off Button |
|
H |
Floor Box |
2
86.0602.00 Rev F
BASIC OPERATION 2 Power On/Off Button
The power on/off button is located on the base of the chair. When the button is pressed in, the chair and any attached systems have power. When the button is out, the chair and any attached systems have no power.
Figure 3. Chair Power and Stop Plate
Swivel Brake
Stop Plate
Chair Stop Plate
Power On/Off
If an object presses against the chair stop plate (see Figure 3) as the chair is lowered, a limit switch will interrupt and reverse the chair motion to prevent damage. Should anything inadvertently become lodged under the chair, press on the footswitch or touchpad to raise the chair so the object can be removed. As long as pressure is applied to the stop plate, the chair will not move down.
Swivel Brake
86.0602.00 Rev F
3
The chair can rotate to any position within 30° either side of center. The chair swivel brake (see Figure 3) restricts rotation of the chair to keep the chair from moving during a procedure. To engage the brake, pull the brake lever rmly to the left. To release the swivel brake, pull the brake lever to the right.
A-dec 511 Dental Chair Instructions for Use
Status Icon
Used A-dec 511 Dental Chair Positioning
You can operate the chair manually or using programmed presets from the A-dec delivery system touchpad or the chair footswitch (see Figure 5). See the following section for footswitch operations.
Figure 5. Footswitch Controls
When an A-dec 300 or A-dec 500 system is installed on the chair, the A-dec logo on the touchpad illuminates, indicating the status of the chair (see Figure 4).
• Solid blue—normal operation and power is on.
• Blinking— chair stop plate or cuspidor limit switch is active. The icon returns to solid blue once you remove any obstructions. Figure 4. Status Icon
Status Icon
|
Icon/Number |
Action |
|
Back Down |
|
|
Back Up |
|
|
Base Down |
|
|
Base Up |
|
|
Program Button |
|
|
Entry/Exit. Automatically positions chair for patient entry/exit. |
|
|
Treatment 1. Automatically positions the chair base and back in a supine operating position. |
|
|
Treatment 2. Automatically positions the chair base and back in an operating position for working direct. |
|
|
X-Ray/Rinse. Automatically positions the chair base and back for either x-ray or rinse. Toggles between this position and the last manual setting. |
4
86.0602.00 Rev F
Used A-dec 511 Dental Chair Manual Controls
The Base Up/Base Down buttons raise and lower the chair (see Figure 5 on page 4). Press the up or down arrows on the footswitch and hold until the chair reaches the desired position.
The Back Up/Back Down buttons control the chair back motion (see Figure 5 on page 4). Press the right or left arrows on the footswitch and hold until the back reaches the desired position.
Used A-dec 511 Dental Chair Programmable Controls
Use the program button ( , located on the top middle of the footswitch) to assign and save the programmed chair positions (see Figure 5 on page 4).
Program Chair Preset Positions
To program the chair preset positions Entry/Exit, Treatment 1, and Treatment 2:
- Use the manual controls to adjust the chair position as desired.
- Press and release . One beep indicates programming mode.
- Press the chair position button you wish to reset (for example, press ). Three beeps indicates the new setting is programmed into memory.
Customize the X-Ray/Rinse Button
The X-ray/Rinse functions either as X-ray/Rinse or as a programmable position. To customize:
1. Press and hold buttons and simultaneously for three seconds.
- ○ One beep indicates the button has been con gured as Treatment 3.
- ○ Three beeps indicates the X-ray/Rinse button has been con gured as the X-ray/ Rinse function (toggles between the X-ray/Rinse and the previous position).2. Program the preset position as instructed in “Program Chair Preset Positions” above.
Used A-dec 511 Dental Chair Basic Operation
|
WARNING Ensure that the patient is positioned safely before using the chair preset functions. Always take extra care with small children and patients with limited mobility. Never leave the patient unattended while the chair is in motion. To stop chair motion at any point, push any chair positioning button on the footswitch or touchpad. |
|
TIP If X-ray/Rinse is changed to a preset position, it operates the same as Treatment buttons 1 and 2. |
86.0602.00 Rev F
5
A-dec 511 Dental Chair Instructions for Use
Touchpad Chair Controls
Your touchpad chair controls work similarly to the footswitch, but vary depending on your delivery system. To use and program chair functions on your touchpad, please reference the Instructions For Use that came with your delivery system.
Figure 6. A-dec Touchpad Examples
Note: Touchpad symbols are proprietary to A-dec Inc.
Double-Articulating Gliding Headrest
The double-articulating gliding headrest includes several adjustment features that improve your access to the oral cavity and increase patient comfort.
Use the glide bar (see Figure 7) to accommodate a variety of patient heights. Simply pull up or push down on the headrest until it is in the desired position. The gliding headrest cushion provides additional height adjustment.
You can easily adjust the headrest angle using one hand. Press the adjustment lever to position the headrest. Release, and the headrest holds its position (see Figure 7).
Figure 7. Double-Articulating Gliding Headrest
|
WARNING If the glide bar has exceeded its maximum recommended working height, a warning line will be visible on the patient’s side of the glide bar. Do not use the headrest in a position where this warning line is visible. |
Headrest Cushion
Glide Bar
6
86.0602.00 Rev F
How to Position for Wheelchairs
The double-articulating gliding headrest can be used to accommodate patients in wheelchairs, as shown in Figure 8.
Figure 8. Positioning for Wheelchairs
86.0602.00 Rev F
7
To position the headrest for wheelchairs:
- Slide the headrest glide bar up until it is free from the dental chair.
- Rotate the headrest 180° and slide the glide bar into the backrest. Ensure that the glide bar is pushed completely into the backrest.
- Position the dental chair to its full back-up position.
- Once the headrest is repositioned, adjust the height by moving the dental chair up or down. The patient should be positioned so the wheelchair and the dental chair are back to back.
- Ensure that the wheels of the wheelchair are locked.
Basic Operation
A-dec 511 Dental Chair Instructions for Use
Multi-Position Armrests
The armrests are designed to allow easy access for both you and the patient.
Patient Entry/Exit
Lift the armrest slightly to unlock it, and lower it into the entry/exit position. To reposition the armrest, lift the armrest back into the standard position (see Figure 9).
Working Direct
Rotate the armrest toward the toe of the chair, and lower it into the operator access position. To reposition the armrest, lift up and rotate it into the standard position.
Figure 9. Positioning Armrests
Patient Positioning
To properly seat patients in the chair, ask the patient to sit as far back in the seat pocket as possible. This ensures the best alignment with the lumbar support and headrest.
For optimal comfort, patients should place their forearms on the armrests or keep their arms comfortably folded on their lap.
|
WARNING Do not allow patients to drop their arms behind the armrests or under the backrest during chair movement. Ensure that the patient is positioned safely before using the chair preset functions. Always take extra care with small children and patients with limited mobility. Never leave the patient unattended while the chair is in motion. To stop chair motion at any point, push any chair positioning button on the footswitch or touchpad. |
8
86.0602.00 Rev F
ADJUSTMENTS AND MAINTENANCE 3
The following section covers built-in adjustment points and features designed to help
simplify maintenance of your A-dec 511 chair. These include:
- Swivel Brake Tension
- Glide Bar Tension
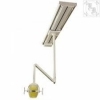
- Monitor Mount Drift and Tension
- Upholstery Replacement
- Floor Box
- Care and AsepsisSwivel Brake TensionIf the chair swivels left or right with the brake engaged, or if it is dif cult to move with the brake disengaged, adjust the swivel brake tension. To adjust the tension, use a hex key and turn the tension adjustment screw clockwise to increase brake friction or counterclockwise to decrease brake friction (see Figure 10).
Figure 10. Chair Power and Stop Plate
Swivel Brake Handle
86.0602.00 Rev F
9
Tension Adjustment Screw
A-dec 511 Dental Chair Instructions for Use
Glide Bar Tension
If the headrest drifts downward, or if it is dif cult to move up or down, the glide bar tension needs to be adjusted. To adjust the tension, use a hex key and turn the tension adjustment screw clockwise to increase friction or counterclockwise to decrease friction (see Figure 11).
Figure 11. Glide Bar Tension Adjustment
Floor Box Utilities
The utilities for A-dec 511 chair-mounted delivery systems are located in the contoured oor box under your chair. To maintain these utilities, see the Instructions For Use that came with your system. If you have a chair-only con guration, you may still have a oor box that hides the power cord and duplex outlet (see Figure 12). To access, remove the cover by lifting up and off the oor box frame.
Figure 12. Chair-Only Floor Box
Floor Box Frame Duplex Outlet
10
86.0602.00 Rev F
Barrier Protection
A-dec recommends barrier protection for all applicable touch and transfer surfaces. Touch surfaces are areas that come into contact with hands and become potential cross- contamination points during dental procedures. Transfer surfaces are areas that come into contact with instruments and other inanimate objects.
In the USA, barriers must be produced under the Current Good Manufacturing Practice (CGMP) as speci ed by the U.S. Food and Drug Administration (USFDA). For regions outside the USA, refer to the medical device regulations speci c to your location.
Adjustments and Maintenance
|
CAUTION If you use barriers, always replace the barrier lm after each patient. |
|
IMPORTANT For recommendations on cleaning and chemical disinfection of touch and transfer surfaces (where barrier protection is not applicable or when barriers are compromised), please see the A-dec Equipment Asepsis Guide (p/n 85.0696.00) included with your equipment. This document is also available at www.a-dec.com in the Document Library. |
Upholstery
To preserve the quality of your A-dec upholstery, use barrier covers instead of relying on chemicals. Barriers signi cantly extend the life of the upholstery and will help to preserve its luxurious look and soft feel. To clean the upholstery, use a solution of mild detergent and water. Use surface disinfectants only when the barriers have been compromised or if there is visible spatter on the upholstery.
|
CAUTION Minimize the use of surface disinfectants on the upholstery. Chemicals |
86.0602.00 Rev F
11
A-dec 511 Dental Chair Instructions for Use
APPENDIX: SPECIFICATIONS AND A WARRANTY
Speci cations
Chair Capacity
Patient Load: 400 lb (181 kg) maximum Accessory Load: 250 lb (113 kg) maximum
|
NOTE Ensure that the chair was bolted to the oor during installation. |
|
For chair accessory load capacity, electrical speci cations, identi cation |